
There is no real magic formula for splash photography.
A lot of photographers like to collect splash photography assets but in my experience, it’s always difficult to find assets that you like which also match the environment that you are shooting in.You can spend a lot of time in Photoshop colour balancing, matching saturation and luminosity levels in order to get the image you want or alternatively you can roll up your sleeves and throw loads of liquid around in your studio. Which one sounds like more fun?
Splash photography layer walk-through in Photoshop
Splash Photography Equipment
The first thing that you need to consider when photographing splashes is whether or not you can freeze the motion. You need to expose the sense of your camera to the light source for the shortest amount of time possible. If you are lighting a subject with artificial light, you will very quickly run into the limitations of your equipment at the sink speed for your flashes (normally around 1/125 to 1/200). If you set your shutter to go any faster, you will start to lose synchronisation with your light source and only partially expose the frame. Using high-speed sync will drain a large amount of power from your flashes and result in a longer flash duration which will also fail to freeze the motion correctly.
The solution is to Set your camera to the fastest available sync speed (200th of a second on my current system) and set the exposure to be completely black under ambient light. The next consideration will be how you like the scene relative to your flash duration. Although you might assume that your flash is putting out more light at a higher setting and less light at a lower setting, in actual fact it always gives off the same amount of light but for a longer or shorter duration depending on the power setting that you dial in. By using a very low power setting on your flash, you can ensure a very fast flash duration that is capable of freezing motion even with high-speed subjects.
It is quite rare for me to get involved in Splash Photography, I primarily shoot headshots and products so I don’t usually require lights that are capable of extremely fast flash durations. My primary light sources are the Godox SK300ii and SK400ii strobes. Neither of these lights are capable of freezing motion as their T1 speed is not fast enough. If I wanted to add high-speed strobes to my studio set up, I would need to look at something like the Godox QT600ii or maybe an AD600 pro.
The T1 measurement is the amount of time that it takes a flash to reduce its power down to 10% of the initial power output. When you are looking at flash equipment, it is important not to confuse the T1 measurement with the T5 measurement as manufacturers will often publish the latter as opposed to the former. The T5 measurement will not give you a good indication of your equipments ability to freeze motion. You will need a T1 measurement shorter than 1/8000 of a second in order to freeze motion.
The good news is that although strobes with very fast T1 times tend to be more expensive, you can easily freeze motion using speed lights and in this case are used the Yongnuo 560ii flashesWhich currently retail at around £50 on Amazon. The problem with using flashes to freeze motion is that they have to be fired on a low power setting so you will need to compensate by either opening your aperture, increasing your ISO or combining multiple flashes to generate more light.
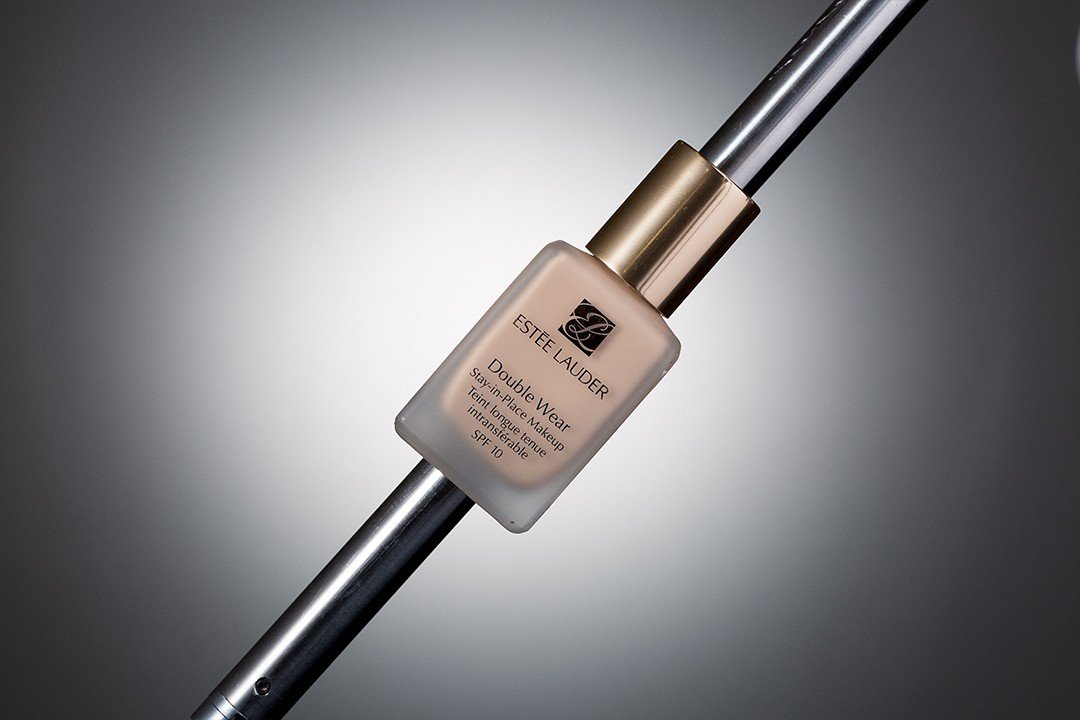
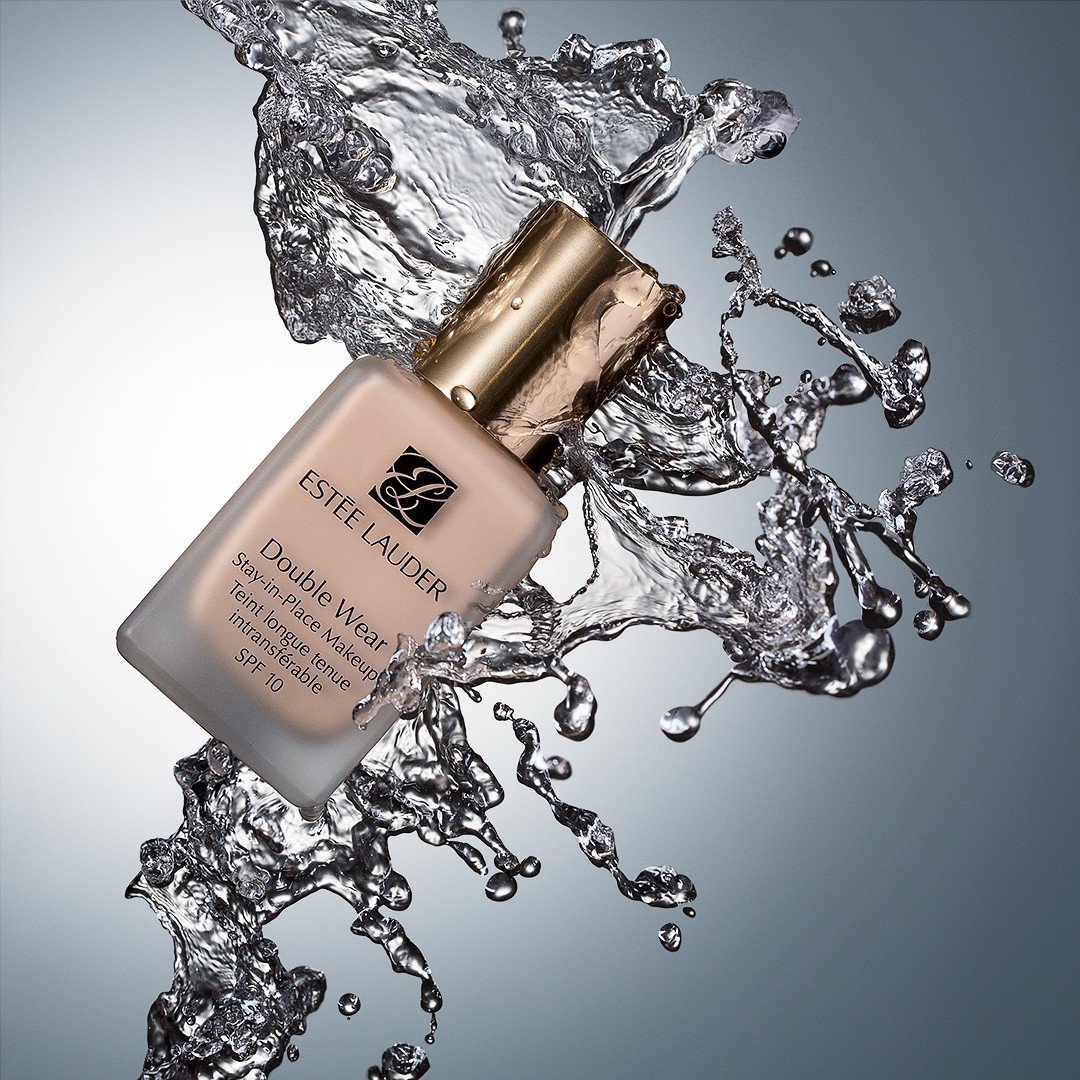
Before we start looking at the layers that make up this image in photo shop, this is the result of my original lighting set up using just speed lights and tracing paper.There is a graded speed light behind a sheet of tracing paper directly positioned directly behind the product. The grid controls the fall off of the light and gives a nice circular gradation across the background. There is a speed light to the left of the camera inside a strip box which is diffused twice using the internal baffle and the external diffusion material. The flash to the left of camera is also firing through a sheet of tracing paper in order to gradate date smoothly across the side of the product specifically the reflection in the cap. To the right of the product there is a large sheet of phone call acting as a reflector to fill in any shadows.
Background Removal and Clean-Up in Photoshop
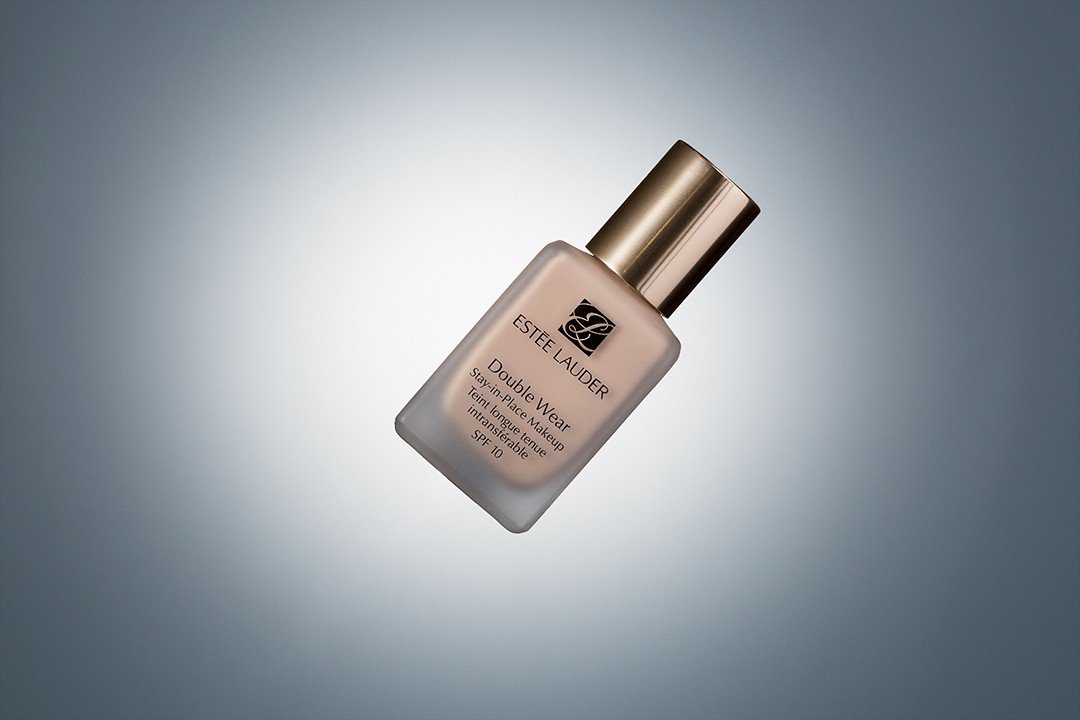
Once I had a good base image, I just needed to remove the boom arm that was holding the product using regular masking techniques in Photoshop. Unfortunately, during the set up for the shoot, the glue failed and dropped the product directly onto the concrete floor of my studio. This cost me a bit more time in Photoshop as I had to clean up the product quite a lot using frequency separation before I could move forward with the edit. I also took the opportunity to sample the colour of the product and apply the inverse of that colour to the background. I sampled the colour and created a layer filled with that colour, then held down CTRL+I invert it and then set the blend mode of the layer to “soft light”.
Adding the Splashes
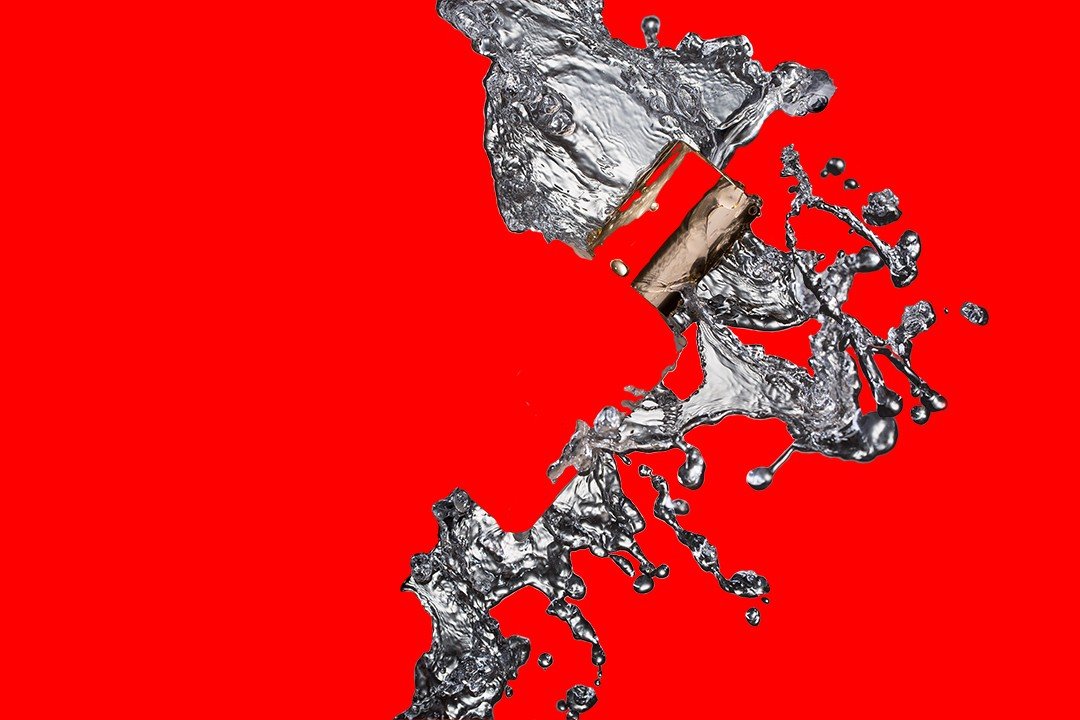
The next step is to add the splashes and there are no shortcuts here. Splash photography is a numbers game. The first job is to get a clean backplate that you can work with in Photoshop. Once you have a clean image, you can start throwing water at it and the general rule is to get as many shots as you can in the time that you have in order to give yourself the best possible chance of producing the work you had imagined originally once you arrive in Photoshop.
Although there are a number of advanced techniques for masking in Photoshop, when working with random compositions, I find the best option is just to use junk masks. I will very quickly cut out the elements that I like from their original layers and roughly compose them on top of my backplate. Once I start to see a decent composition I will begin working to tidy up the positioning and the masks. If you are working with transparent liquids such as water it can be very difficult to find enough contrast between the subject and the background to use your channels to get a decent selection. You will also find with moving water that one edge could be very crisp with a definite outline where the other edge is softer and transitions into the background.
I find when working with organic shapes like this, the best option is just to pull out your brushes and paint the masks in by hand. It can seem daunting at first but it’s definitely the quickest way to move forward in my experience. I will often place a solid colour layer behind the subject so that I can see my work clearly as I develop my masks.
Finishing Off the Image
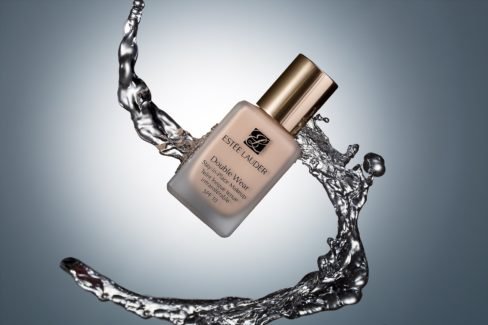
Once you have masks all of your splash photography into the image all that is left to do is the usual finishing moves. If you have ever seen any of my videos or read my articles previously, you will know I have an action that sets everything up for me. On this occasion, I simply added sharpening and a contrast curve using regular high-pass sharpening. I ended up with two edits and could not choose between them so I decided to feature them both in my portfolio.
Splash Photography 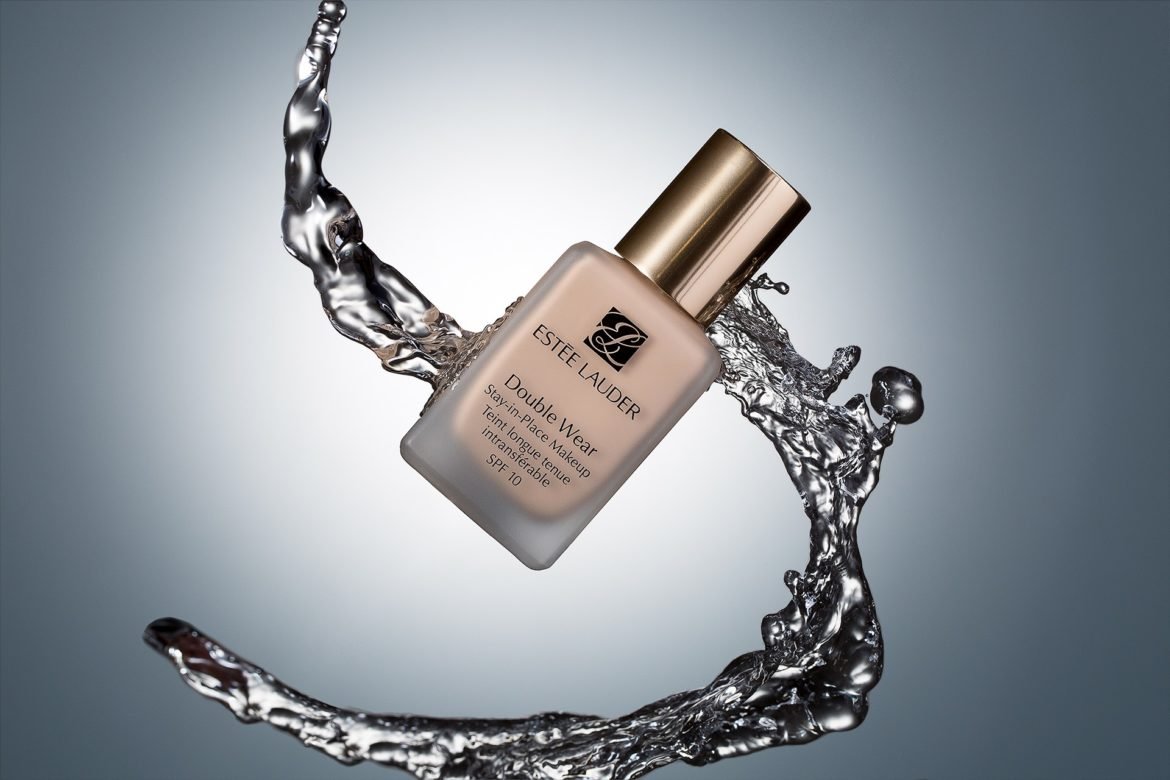
Splash Photography